The Turn Signal audio “alarm” is apparently not really an alarm, but audible clicking noises replicating the sound of turn signal flashers of yesteryear, in-sync with the turn signal and hazard warning flashing lights, and doesn’t seem to be loud enough for a majority of us driving 124 Spiders, especially with the top down, which is how the car is meant to be driven. I’m writing this article in answer to seeing another inquiry posted on the Miata.net forum by MX-5 owners, also wanting the volume turned up. Even at the Loud setting, just like the beeps letting you know you’ve reached the lower and upper limits of the cluster dimmer control (rather than mechanical stops), I’ve yet to know what they sound like. Yet, I almost jumped out of my seat the first time a faulty interpretation of ABS data triggered a false TPMS alarm, proving to us – that same audio transducer, located on the rear side of the instrument cluster circuit board, is capable of being plenty LOUD!

Sergey provided a nice photo of the actual transducer (think of it as a tweeter) in his excellent Instrument Cluster analysis discussion. I’m assuming it’s obscuring the “BZ1” component callout (Buzzer #1) on the circuit board, and I’m also curious what purpose a second transducer (BZ2, which is not present) was intended to serve (text-to-speech?).
Anyways, BZ1 is mounted adjacent to the stepper motor for the speedometer, close to the right-side edge of the circuit board, and this probably aligns quite nicely with the small slotted grill opening in the cluster canopy designed to allow some portion of the emitted sounds to enter the cabin.

courtesy of mx5things.com
So figuring out how to alter the existing personalization command that communicates to the Instrument Cluster via the HS-CAN network, the volume level value for the loud setting for the Turn Signal audio (which appears to use the same transducer) to a value much higher than the current setting, yet not quite as loud as the TPMS alarm, would be of value to those of us, currently unable to hear the alarm. The TPMS Reset acknowledgement beep (which is quieter than the alarm) volume seems about perfect, and I would like to determine that value, and use it as a good starting point. If someone could intercept these commands over the HS-CAN network, a tweak that would replicate the personalization command (using the louder volume value though) should be easy enough to write. This is all assuming that the values aren’t predefined in the Instrument Cluster, and that the command isn’t simply choosing either the Low or High predefined values, but rather, is actually defining the preferred volume value.

Additionally, be aware of the personalization setting shown directly underneath the Turn Signal audio volume – the Lane Change Three-Flash Turn Signal feature. I find that enabling that feature to be very helpful, as it means that by using the momentary-on portion of the switch, resulting in three light cycles, rather than one, and thereby not actually engaging the turn signal lever past the “click” into it’s auto-cancelling mode, it can’t be left on accidentally. By using this feature for shallow turns, you should find your turn signals behaving as you’d expect, since the self-cancelling feature functions properly after sharper turns.
Here is an illustration showing how the Turn Signal audio “alarm” functions, and by comparing it to the top illustration, you can see that both alarms seem to be actuating the same transducer (labelled buzzer):

SOLUTION TO “INAUDIBLE TURN SIGNAL REMINDER”
[UPDATED 10/19/2018, 10/30/2018]
My previous assumption…
This is all assuming that the values aren’t predefined in the Instrument Cluster, and that the command isn’t simply choosing either the Low or High predefined values, but rather, is actually defining the preferred volume value.
turned out to be false, and rather than attempting to tweak the Instrument Cluster, Sergey (aka ssh16; website: mx5things.com) has developed a plug-in “Warning Timer for Turn Signals” device that plugs into the OBDII port, also monitoring the turn signal lights over the CAN network, that is programmed to:
- activate at a respectable volume, a reminder beep (similar to the
seat belt TPMS warning), should the turn signals be left on for more than 16 seconds, while the car is in motion (over 2 mph)
- then remain on, until the turn signals have been turned off
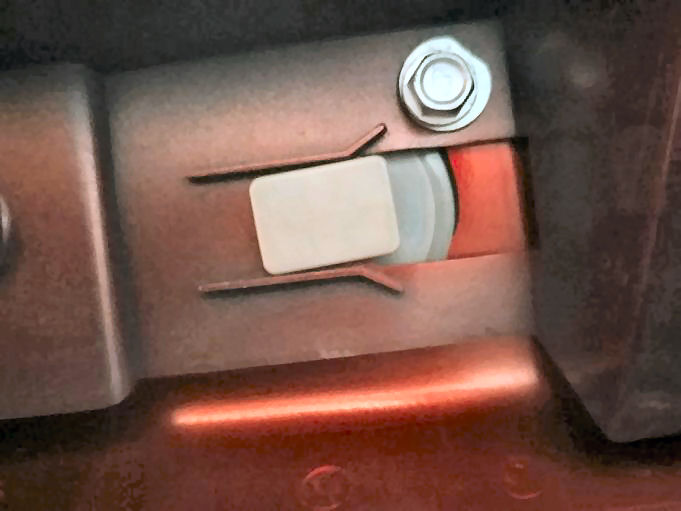
- [BONUS] also serve as a footwell courtesy lamp when the driver’s door has been opened, that fades off once the door has been closed
I have one on order, and a review is forthcoming.
I’ve installed the Warning Timer for Turn Signals device, and am somewhat disappointed that I need to slow the car down (and turn off the radio) in order to hear the turn signal reminders, even after I changed the AKE beep* volume from Medium (default) to High. In my opinion, I don’t find the turn signal reminders to be of sufficient volume within a convertible sports car (which really is the primary purpose of this device), and I’m encouraging Sergey to implement the TPMS beeper instead. <<< See the Update further down, where I installed Version 2 with the reprogrammed beeper.>>>
However, just so my feedback doesn’t sound all negative, other than the volume, I REALLY like the device!
- low profile – I can’t even see any protrusion, so naturally your knees are never going to bump it
- can be easily removed so that deep-sleep current draw isn’t an issue during winter storage
- footwell lighting seems to be the same 6000K light from LEDs that my SiriusLED dome lamp replacements display (nice clean bright white)
- very robust construction means that device should never fall apart
- can be easily installed and removed by feel, once you are familiar with the orientation, so that you needn’t crouch besides your vehicle
- hopefully, it can be easily reprogrammed as consumer demands dictate
⇓ If you use the OBD2 port for scanners or other devices, you might be interested in a pass-thru OBD2 24″ cable, that will allow your Warning Timer for Turn Signals device to remain plugged in (albeit protruding out ¾” more), yet be able to plug other devices into the extension cable at the same time.

 * Apparently, the “Non-Presence of Remote AKE Transmitter Beep” is the one chosen for the initial devices, but I
 have had faith that mx5things will would eventually find a different CAN command to trigger louder reminder beeps. Since a publicly available list of CAN commands addressing the Instrument Cluster doesn’t exist, it’s much easier to monitor the communication of an existing module as it triggers a beep, and borrow that set of instructions instead. Below, you will find a list I’ve put together of various other beeps that can be monitored, and using the passive TPMS beep commands currently looks the most promising.
[UPDATED 11/8/2018, 7/17/2019]
Rating: ★ ★ ★ ★ ★ (5 out of 5)
mx5things did reprogram the device (Version 2) to trigger the passive TPMS beeper, which unlike most of the other beeps, functions at 100% volume! Although some might consider it to be a tad too loud once in awhile, it definitely fulfills it’s mission for most any driving environment now.
This is a fantastic add-on for both MX-5s and 124 Spiders, especially if you find the default reminder beeps to be too quiet, and I think it’s a shame that Mazda design engineers didn’t choose a louder beep to accompany some other warnings, like the “Low Fuel” lamp. In fact, the “Low Fuel” lamp (which is hidden from view for many, doesn’t even have an associated beep, so by not catching the attention of the driver, it’s execution schema could potentially result in a life-threatening situation, rather than serving as a timely useful reminder/warning.
If your vehicle has a TPMS Set button, and virtual software triggering, rather than actual TPMS sensors, then this device will work!
** NOTE **
2019 + 2020 Fiat Spiders apparently no longer have passive TPMS, so for those vehicles, Sergey had to revert back to the Seat Belt Reminder beep which may not be loud enough for some (it wasn’t for me), so be aware of that (and test that beep out) before ordering. Hopefully he can learn the active TPMS command, and perhaps program the device to broadcast both, so that one of the commands will result in the desired beep.

Various Warning Beeps to choose from…
Lights-On Reminder
The lights-on reminder is operable when the time setting of the “auto headlights off” function is off.
If lights are on and the ignition is switched to ACC or off, a continuous beep sound will be heard when the driver’s door is opened.
If the light switch is left on, the “auto headlights off” function automatically turns off the lights about 30 seconds after switching the ignition off. The time setting can be changed.
[The beep volume setting can be changed High (75%) / Low (50%) / Off.]
Air Bag/Seat Belt Pre-tensioner System Warning Beep
If there is a problem with the air bag/seat belt pre-tensioner systems and the warning light illumination, a warning beep sound will be heard for about 5 seconds every minute.
The air bag and seat belt pre-tensioner system warning beep sound will continue to be heard for approximately 35 minutes. Have your vehicle inspected at an Authorized Mazda Dealer as soon as possible.
[The beep volume is preset at Unknown.]
Seat Belt Warning Beep
If the driver’s seat belt is not fastened when the ignition is switched ON, a beep sound will be heard for about 6 seconds. If the driver or the passenger’s seat belt is not fastened and the vehicle is driven at a speed faster than about 20 km/h (12 mph), a beep sound will be heard again for a specified period of time.
Until a seat belt is fastened or a given period of time has elapsed, the beep sound will not stop even if the vehicle speed falls below 20 km/h (12 mph).
[The beep volume is preset at Unknown.]
Advanced Keyless Entry
Key Left-in-trunk Warning Beep (With the advanced keyless function)
If the key is left in the trunk with all the doors locked and the trunk lid closed, a beep sound will be heard outside of the vehicle for about 10 seconds to notify the driver that the key is in the trunk. In this case, take out the key by pressing the electric trunk lid opener and opening the trunk lid. The key taken out of the trunk may not operate because its functions have been temporarily stopped. To restore the key’s functions, perform the applicable procedure.
Key Left-in-vehicle Warning Beep (With the advanced keyless function)
If all the doors and trunk are locked using another key while the key is left in the cabin, a beep sound will be heard outside of the vehicle for about 10 seconds to notify the driver that the key is in the cabin. In this case, take out the key by opening the door. A key taken out of the vehicle using this method may not operate because its functions have been temporarily stopped. To restore the key’s functions, perform the applicable procedure.

Non-Presence of Remote Transmitter Beep (With the advanced keyless function)
If the remote transmitter isn’t present in the vehicle, when both doors are closed with the ignition not switched OFF, a beep sound will be heard both outside and inside the vehicle, to notify the driver that the presence of the remote transmitter cannot be verified inside the cabin.
[The beep volume setting can be changed High (75%) / Medium (??%) / Low (50%) / Off.]
Power Steering Warning Buzzer
If the power steering system has a malfunction, the power steering malfunction light turns on or flashes and a continuous beep sound will be heard at the same time.
[The beep volume is preset at Unknown.]
Passive Tire Inflation Pressure Warning Beep (TPMS) ✅
The [loud] warning beep sound will be heard for about 3 seconds when there is any abnormality in relative wheel speed, assumed to be due to a change in tire inflation pressure.
[The beep volume is preset at 100% (High), and can not be changed.]
Active Tire Inflation Pressure Warning Beep (TPMS)
The [loud] warning beep sound will be heard for about 3 seconds when there is any abnormality in an actual tire inflation pressure.
[The beep volume is preset at 100% (High), and can not be changed.]
Blind Spot Monitoring (BSM) & Rear Cross Traffic Alert (RCTA) System Warning Beep (Some Models)
Driving forward
The warning beep operates when the turn signal lever is operated to the side where the Blind Spot Monitoring (BSM) warning light is illuminated.
[The beep volume setting can be changed High (75%) / Low (50%) / Off.]
Reversing
If a moving object such as a vehicle or two-wheeled vehicle approaches on the left or right from behind your vehicle, the Rear Cross Traffic Alert (RCTA) warning sound is activated.
[The beep volume is preset at 100% (High), and can not be changed.]
Lane Departure Warning Sound (Some Models)
While the system is operating, if the system determines that the vehicle may be departing from the current lane, a warning sound is activated.
[The beep volume is preset at Unknown.]
.


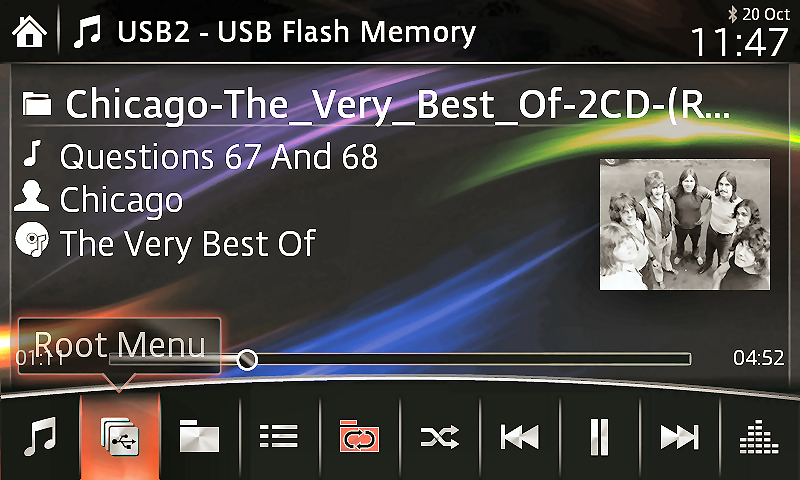
 I discovered today that my database was 5 – 6 years old, as apparently I had never gotten around to installing version 9, so I was still using version 8. Anyways, it was thought that the version 9 (June 2018) update might be the last one released for our Fiat Connect system (and Mazda Connect1), but hawke had observed that version 12 was included in 74.00.324A EU N firmware, and located Visteon’s newest version of the files (thanks for posting ash8). Downloads: