Most of the Great Photos, courtesy of Peter T.
(click them to enlarge)
![]()
A few lucky Abarth shoppers in Europe have already been able to scoop up some pre-releases of the new ABARTH 124GT, and although they don’t have the GT emblem (part # 52117178) affixed to the decklid spoiler, they do have all of the package goodies – the primary ones being:
- the stunning new 35-pound carbon-fiber composite lined hardtop, which I predict will also become a highly sought after Mopar accessory item, despite the price, especially among those that race their cars
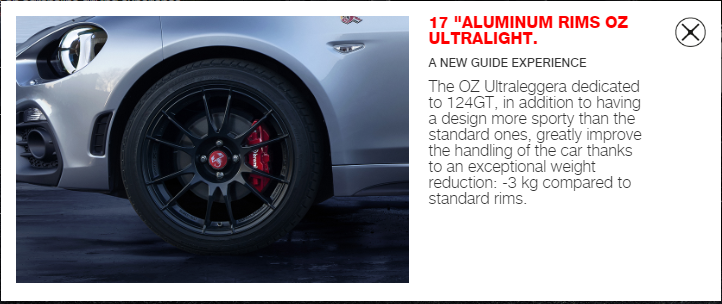
- and OZ’s great looking black aluminum alloy wheels that were produced exclusively for this model.
⇓ Peter T. (from Italy) not only is the proud owner of one of these pre-release vehicles, but I see that it is the new hue of blue! He has shared some close-up photos with me, so that others considering purchasing a 124GT (250 are scheduled to be produced), or simply thinking of adding the removable hardtop to their 124 Spider, will have an idea how they are attached to the vehicle. Take note of the great field of vision due to the wraparound rear glass that almost parallels having the top down (80% better than with the closed soft top).

Wheels
Peter probably didn’t realize how much interest there would be in the OZ wheels, when he happened to include a couple of photos of those as well. 😉
Right off the bat, I hit him with a question that I deemed off-topic, but now I’ve decided that this article will be about both the hardtop AND the special wheels.
I wonder if the offset of these OZ wheels is their normal +37 mm, or the typical +45 mm of Mazda/Fiat wheels?
My guess is that since OZ’s normal retail 17″x7″, 4×100 mm “Ultraleggera” (Ultra-Light) wheels:
- each weigh 7.257 kg (16 pounds), and are each rated for 1,254 pounds for a total of 5,016 pounds, which includes quite a variety of vehicles.
- certifications affixed to wheels:

- are available in 30, 37 and 44 mm offsets, but not 45 mm.
and the OZ wheels that are standard equipment on the ABARTH 124GT (which only weighs 2,500 pounds):
- were developed by OZ exclusively for this car, so the offset
may very welldoes meet Fiat’s spec of +45 mm (to clear the Brembo brakes), as verified in a photo Peter sent me on 5/30/2018 (shown below) and OZ’s coding “ET45” - based on the same photo, OZ’s part number is probably W01A60001 and it looks like the color is matt black (probably the same wheel produced with a different part # in color white for the ABARTH 124 RALLY TRIBUTE)
- it appears that the Fiat part # is 52109667
- are each 3 kg (6.6 pounds) lighter than the stock Abarth wheel per Fiat, reportedly resulting in a weight of 15.18 pounds (without the TPMS sensor)
- which makes them 0.82 pounds lighter than their aforementioned retail equivalent, so they obviously have a lower weight rating ⇒ actually rated at 750 pounds max. (340 kg) for a total of 3,000 pounds (vs. 5,016 pounds)
- same Ultraleggera alloy mix: Al Si 7 Mg
- “7Jx17H2”: I was curious what the H2 meant ⇒ Double hump profile of the rim for fitting tubeless tires which ensure that the bead is seated on the two balconies, even when the inflation pressure is lower than the operating pressure, preventing bead seat dislodgement.
- aside from the JWL VIA (Japanese Homologation Institute VIA), unsure as to what other certifications these wheels have received, since Peter’s photos don’t reveal all of the markings.
⇓ The Brembo brakes are substantial, which is why the +45 mm offset is required.

courtesy of Phillip Stephens (showing off his Ohlin coilovers)
Which brings up another question:
Can 124 Spider owners now order these wheels and/or the hardtop, as a Mopar accessory item?
⇓
⇓ The weight savings resulting from choosing OZ’s certified alloy wheels vs. the standard wheels on the Abarth 124 intentionally counteract a good portion of the weight gain from the added hardtop, so that there would be no net-loss in performance claims, as a result in ordering the 124GT package.


Hardtop
[UPDATED 1/20/2021 with more photos, and advice primarily having to do with the rear mounting]
Hardtop – Window Glass
⇓ This has got to be the first piece of 124 Spider glass, that doesn’t have the Mopar logo on it. Instead it has an Abarth logo prominently displayed. Is this a clue that the GT isn’t coming to North America?

The window defroster wire is connected to the hardtop glass via an extension harness (that should come with the hardtop; P/N shown on label photo, allowing the soft top defroster to remain connected), since the wrap-around glass connects further away ⇓ .
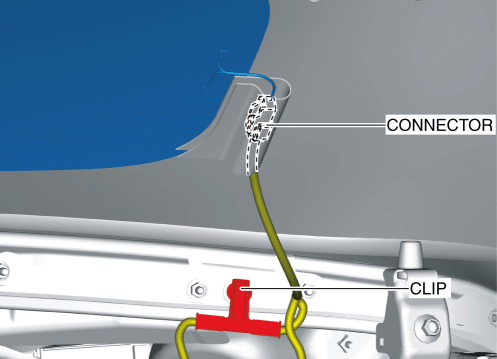

You can leave the defroster extension cable connected (loop the excess) when attached to the soft top in summer mode

photos, courtesy of Santtu Ahonen
Hardtop – Beltline Brackets
⇓ There are two brackets mounted in the soft-top well that the hardtop is attached to.


Peter later discovered that it is important that you not get these brackets (he identifies them as fixtures) mixed up, as they accommodate the body curve and the top will not fit as well if the brackets are not installed properly, and on the correct side of the vehicle. With all the stampings visible on the those parts, I’m surprised LEFT and RIGHT aren’t also stamped on them.
⇓ Looking at the fixtures from the inside of the car felt good when installing, but something kept nagging at me. So tonight, I switched right and left. Now I know it’s proper. Now when tightening the 13 bolt, the hardtop and body mate together over the length of the fixture.
The fixtures are not identical, but are each others mirror image. When looking from the side you can see lines that converge toward the back end (blue arrows), whereas the front side is the higher end (yellow arrows).

Peter and Tobias have also discovered that the “beltline molding protectors” will get marred or crushed, if:
- too much torque (don’t exceed 2.5 N♦M / 22 in♦lb) is applied to the hold-down bolts into the inside lateral brackets (especially when right and left are erroneously switched)
- and/or if the brackets (Fiat part numbers: 6000614068 and 6000614069) aren’t fit perfectly ⇓
and that the addition of some cushioning material might be advised, as well.

Hardtop – Rear Mounting Tabs
[UPDATES 6/3/2019 & 1/20/2021 per Peter T.]
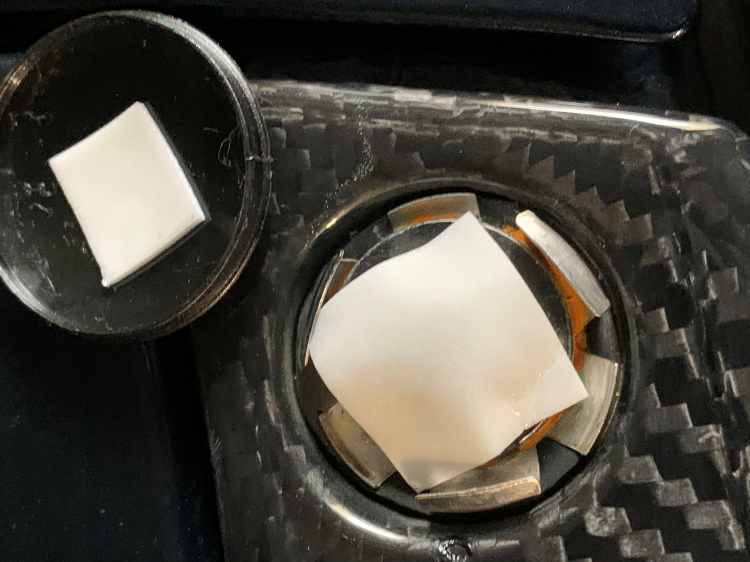
⇓ The painted plastic cover plates (body color vs. chromed metal in NA thru NC) that are normally installed on the non-GT models, to cover up the removed hardtop’s external tab wells that house a weld-nut designed to accommodate the hard top, along with plugs, washers, supports and 2 shorter Torx bolts, should all be found in a bag in the trunk, since they are all removed from the decklid plate area, in preparation for installing the hardtop.
Now us soft-top owners have a better idea as to what’s underneath those cover plates. 😉


⇓ Bonus: From the GT Hardtop Owner’s manual, I’ve put together an illustration that shows how the cover plates are attached/removed/installed.

⇓ This is what is underneath (disassembled). The clip then holds the painted covers.

Several people in Italy and Belgium have bought themselves a hardtop and as a GT owner with some hardtop experience I can help them out. I’m very happy I contributed to the article you wrote since I can refer to it for more info.
Also for hardtop owners; under dry climatic circumstances, the hardtop may exhibit disturbing noises. This happens at one or both of the back fixtures. As you can see from the pictures below ⇓ , the Torx screw actually does not touch the sides of the hole through the carbon tabs. Just by inserting a rubber washer between the Torx and the tab as shown, the rather gruesome grinding noise stops at once 👍.
Here is a mini guide to get everything snug and fitting. Since the kit with accessories contain rubber rings it’s a bit of a puzzle to get things down right.
Why? Because when you put the rubber ring where it’s supposed to go, you’ll notice the outer diameter is too large. It has to be trimmed down to fit. Now the rubber ring is such thickness that in the center where the torx screw goes there will be a depression. I made things flush with a smaller inner rubber ring. This has two advantages; when tightening the bolt down on the metal cap retaining clips with the Torx (don’t exceed 2.5 N♦M / 22 in♦lb), the rubber will be equally distributed without pushing up at the sides and as such inhibiting mounting the round plastic cover. And second no water can penetrate.
I added one more rubber ring (small) between the Torx and the metal cap retaining clips. If else it will corrode when it rains or when you wash the car.
A tip about washing the car with a power hose (do not direct the water spout horizontally because the water can and will pass the rubber seal between the hardtop and the rear beltline rubber).


⇓ Metal cap retaining clips with OEM rubber ring. Spread out the metal cap retaining clips, so that the cap “snaps” on, rather than sits on top.

⇓ The inside rubber ring to the right
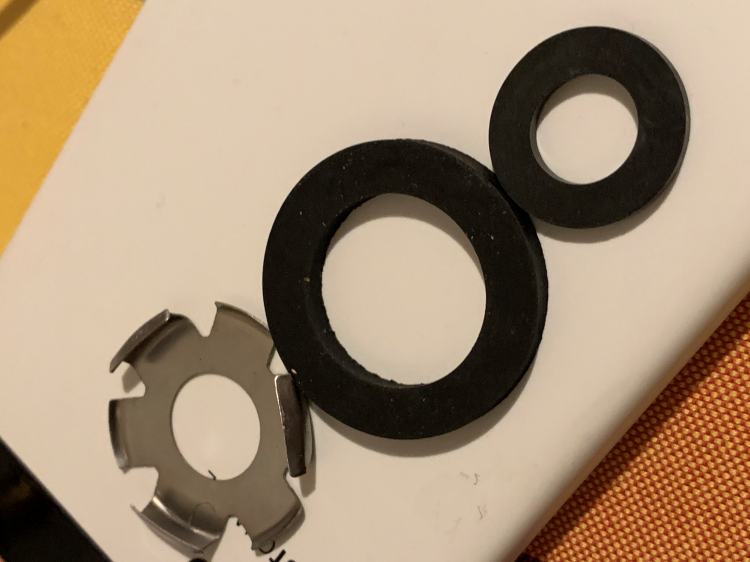
 ⇓ The same dimensioned rubber ring on top of the metal cap retaining clips to prevent corrosion.

⇓ Here you can see the thick rubber ring (OEM), and one from the kit I bought with various sizes


⇓ Several materials I tested to counter corrosion of the metal cap retaining clips and torx screw. In the end which works best are the rubber rings and double sided foam tape.

⇓ This 3M 1mm double sided foam tape is the best solution to be sure that even with the metal cap retaining clips, the cap will not just fly away. Here you see two pieces, but just one is needed. Lawson Gibbles reports that Mopar will mail you some caps (as a courtesy), if you ask nicely, should you find yours missing. In her case, there was a different part # associated with the package of 4 caps (1070100125).

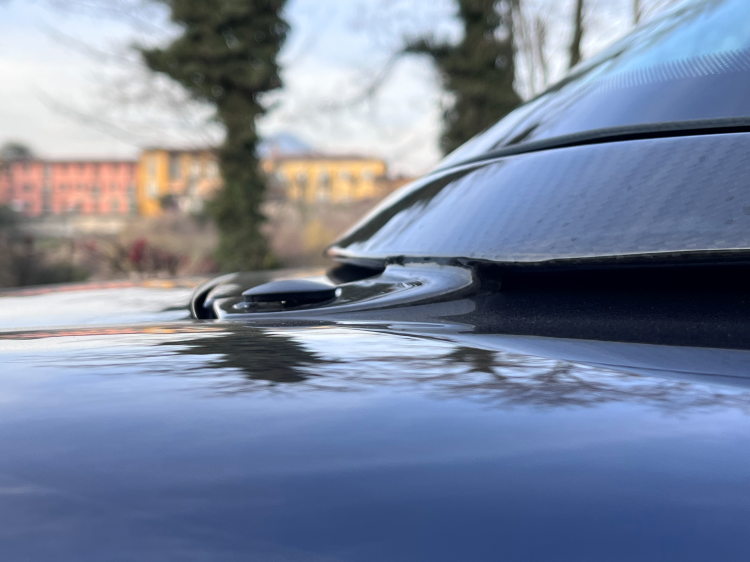
Hardtop – Header Mounting
⇓ Here’s a close-up showing the header latch and liner.

⇓ and here is a good stock photo from abarth.com/124-gt that I adjusted the brightness level on, to reveal the hardtop’s underside and mating to the header. Very nicely done!
Hardtop Installation
⇓ Santtu Ahonen has written a great How-to article on installing Ricambi’s GT hardtop (purchased as a kit from a dealer) for those wishing to install one onto their own Abarth 124. This grouping of photos are courtesy of Santtu Ahonen, from the same article.
Note however, that he later observed:
I do not think there is any way for you to connect the cable after you have installed your hard top. This is where the owners manual goes horribly wrong!
…yet being unable to edit his installation instructions overview post, I’ve added the corrected version here (additions in red), in hopes that it helps someone from having to start over:


[UPDATE 10/18/2019]
I’m not sure how Mopar can rectify the missing parts for those that purchased the hardtop installation kit from the initial production runs, but Peter had his hardtop replaced under warranty due to a rear mounting tab that failed, and happily reports that
- two sets of the Torx40 caps (part # 735696829)
- along with metal cap retaining clips that they snap into (part # 735696830)
now come with recent kits (and an “even-more-outstanding” carbon fiber finish of the hardtop itself, as well).


Here is his latest report:
In the upper left corner of the photo below, you can see that I now have two pairs of hex’s to fix the internal brackets. The new ones are much longer, which helps in centering the holes in which they have to go. It does take more time to fasten them all the way (but then it’s also more work for anyone attempting to steal the hardtop).
Two pairs of Torx40 caps [and the metal cap retaining clips that they snap into, which are not as sturdy]. If those upstanding clips are not bent outwards enough, the cap will come loose easily. I invented for myself a small improvement, since I already lost one (luckily I have two and now one backup). Two pieces of double sided foam tape will take care of things not flying away haphazardly…
Also new are the rubber washers; I already used those; maybe someone saw one of my pictures and added them to the kit since then (same for the double set of caps). The diameter and thickness are a bit off, and therefore I replaced them; what happens is that with the washers provided, when you fasten the torx screws, the rubber will bulge up, pushing inwards on the retaining clips, and as such the cap will not be able fully engage with the retaining clips.
What do you see more; the cable for the windscreen heating element plus it’s fuse (now double as well), the velcro strap which sits behind the back cabin wall to keep the cable in place.
Rubber chocks underneath the soft top which replace the Fiat ones when the hardtop is in place. They are about 0,5 cm higher (also double now).
And the foam blocks. Which need to be adjusted. The beveled side is missing and as such it does not insert in a stable way. It also hinders the movement of the window since it pushes the rear window moulding to the outside.
I was spot on with the dimensions, but these blocks are much more dense. On those blocks I made before. you can see which side needs to be beveled (1x1cm 45°). Also the blocks are not in one piece, but instead made from two slices of denser foam which are 3cm high like I did. Because if you take off the hardtop and forget about these blocks, they’ll just fly away…


♦♦♦♦♦
The soft top remains stowed away when the hardtop is in place, but will be available as needed whenever the hardtop is removed. The glass in both tops have defrosting heating elements, but the body control module doesn’t allow the soft top defroster to operate when in it’s stowed away.
Peter pointed out that installing (and removing) the hardtop is a two-person job (one on each side) and involves first engaging the forward edge into the same windshield header wedges that secure the soft-top, prior to lowering the rear edge onto the four attachment points:
- 2 internal beltline brackets (shown above) that are each secured by an anodized 13 mm bolt (4 cm long, 6 mm diameter)
- and 2 external rear mounting tabs that appear* to be integral with the top (hasn’t been absolutely confirmed yet though), that are each secured by a Torx bolt
The mounting bolts are hand-tightened, the header latch is engaged, and then the bolts all need to be properly torqued tight (don’t exceed 2.5 N♦M / 22 in♦lb).
Here is a link to the Abarth Owner’s Manual for the hardtop (thank you Ovo! the 1st page reveals details for the hardtop storage rack that is shown below).
* Per Brian Goodwin, if the 2 external tabs are fixed (not relocatable), then the hardtop can not be used on the ND, since “back deck mounting spots for the tops is where the cars are not the same”.
I have not heard yet as to whether the 124GT will be sold in North America (not sure if the hardtop needs to undergo crash testing in the U.S.?) – but I hope so, so that not only will prospective buyers have a choice, but that would lead to the wheels and hardtop becoming available as “parts”. For those that want hardtop alternatives, DG Motorsports offers two aftermarket versions (fiberglass and carbon-fiber) with lexan rear windows.
[Peter indicated on 6/29/2018, that the Italian publication Quattroruote (July) shows that the carbon-fibre hardtop is shown as a €1200 option ($1,400) when ordering a 124GT, which seems to indicate that dealers (at least in Europe) may be able to order and sell them separately. When purchased as a stand-alone part, they do come with all of the hardware needed to mount to a non-GT 124 Spider, if you are lucky enough to find a source, but expect to pay quite a bit more – between €3800-€3300 which one might be able to drag down by 20%.]
If you wish to see more details on the construction of the hardtops, there is a Construction Quality Guide from the manufacturer @ http://elearnediting.fiat.com/eLearnWeb/ContentPdf.aspx?Pdfid=357000139
Hardtop Storage
For those that track their Abarths, the hardtop is a necessary item on race days, but for most others, the hardtop is considered a seasonal item, and during non-race days or the summertime, it will probably be suspended in the garage in some fashion, so that the convertible can readily be driven topless, as it should be. Peter is dreaming up a pulley rig to do just that, and has volunteered to share his solution, once implemented*.
Meanwhile, since two people are involved in handling the top anyways, I found tr6’s simple, yet effective solution for the 60-pound hardtop developed for the NC (almost twice as heavy!), on the Miata forum with instructions quite promising. ⇓

Wouldn’t this look great hanging over the fireplace? 😉
As a retired FCA automotive engineer, it is my opinion that the hardtop (rumored to have already been developed by Mazda and shelved once the RF, which adds 113 pounds back onto the MX-5, was determined to be the next iteration instead) wouldn’t have passed European crash testing if the external tabs were not capable of sustaining a substantial lateral force to keep the top in-place, but it would be great if either Mazda or Fiat/Abarth would offer confirmation that as long as the top remains static, hanging the hardtop vertically on pins, as illustrated, would be an acceptable/approved storage method.
Perhaps the tabs are actually alloy metal, disguised in “carbon fiber”? All we need is a photo of these tops going down an assembly line hanging by those tabs. 😉

close-up of an external tab – Ronan Glon/Digital Trends
[Added 12/31/2021]
⇓ Thomas Gutdeutsch actually suspends his hardtop from the external tabs, although Peter T. advises caution doing so because “the metal rings which are inside can get loose”.

photo courtesy of Thomas Gutdeutsch
Peter T ~ “You can easily sea the way the tab angles. So even if the weight gets divided by two you will still endo up with 8kgs not hanging straight down, but creating horizontal and vertical vectorial components in the area where it is attached.”
⇓ Santtu also does the same (horizontally)…

all of his photos can be found on his Finnish blog
* [UPDATE 6/14/2018]
⇓ Peter has successfully modified a Thule 838 Kayak Carrier in conjunction with surf board slings, to hang his hardtop vertically (not by the tabs 😉 ), and he is pleased with the outcome. He shared some photos, and his realization that it can be a “one-man” job after all…
I found out the Surfcor padded straps exactly match the size of the carbon top, without the metal parts touching anywhere. Which means that, if by yourself, after having loosened the tabs and brackets and having protected the bootlid [decklid] with some padding; you can place the straps around the roof on both sides. Having backed the car up near the rear wall [of my garage where the rig is attached], the Thule drawing strings in one hand and the front side of the roof in the other, you can do the whole operation by yourself!


For Summer 2019, Peter has decided to keep the hardtop in a silk bag, for even greater protection (and perhaps to help disguise it a little).
…it is completely covered in a silk bag, which actually is a sleeping sac for two. It hangs in a way that no rubber moulding is under pressure anywhere, so no permanent deformation of rubber parts.

Ovo has provided some photos of a rolling hardtop storage rack (with cover) that is available, as well. I think the details are included in the 1st page of the pdf file for the Hardtop Owners’s Manual, that is linked above.


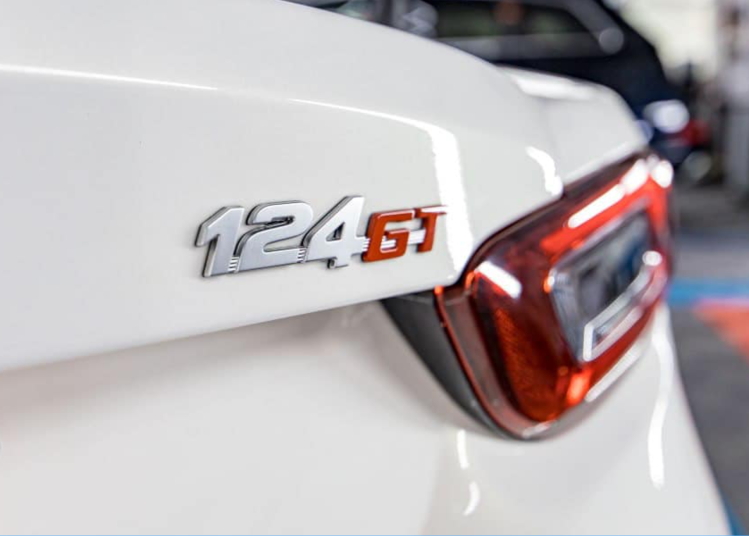
Now, if you wish to finish it off with a new GT badge 😉
![]()
[added 9/15/2019]
Peter noticed a question that Jay posted today regarding foam blocks and the installation of the brackets, and replied by email, since it is no easy task getting photos to display in the comments. The following is his reply:
Here are some pictures of my brackets where the indication ‘lato guida’ means drivers side and ‘Passeggero’ is passenger side.
Another hardtop user soldered the washers on the bolts(13) to make things easier. He also fixes the brackets onto the hardtop before placing. This might make a big difference in not having to fiddle around blind trying to put the bolts in their place. I however am afraid that a wrong manoeuver might make one of the brackets scratch ones paint..
About the foam blocks; my car and hardtop came without. After trying to contact FCA and Adler directly, to no avail, I decided in doing some DIY.
Material:
3cm thick foam pad. Even better if one can find 6cm thick pads. I just glued one half on the other.
Long side: 6cm
Short side: 4cm
Width: 4,5cm
Indent: 2cm x 1cm
Beveled part is 1cm x 1cm cut diagonally (45°)(click on any photo to enlarge)


👋Peter


Gregory tried leaving a comment regarding the OZ wheels question, but experienced some difficulty. I’m therefore going to incorporate it into a dual-role comment myself.
This varies from the source I used; Fantasy Motorsports (the link was contained in the word ‘normal’ and is https://www.fantazymotorsports.com/oz-racing-ultraleggera-wheels-detail.htm?productid=22163866 ) which listed the weight as 18.92 pounds. Many reviews state that the 124GT wheels are 4 kg less than the standard Abarth wheels which works out to 8.81 pounds. There are other reviews that do state that the 124GT wheels are 3 kg (6.6 pounds) lighter though, that agree with your source. I actually doubt that OZ was able to remove 8.81 pounds of aluminum and yet have a wheel that will hold up to racing, yet I have read several claims that OZ was tasked with removing 35 pounds from the weight of 4 wheels for the Abarth to coincide with the weight gain from the added hardtop.
(Peter’s literature also states that the OZ wheels are 3 kg lighter than the standard Abarth wheels, which equates to 6.6 pounds; or a total of 26.4 pounds.)
Gregory goes on to state:
Thank you so much for your wisdom and feedback Gregory! My 12.97 pounds is only the result of using a calculator, so in no way am I going to defend it. I’ll gladly adjust it to reflect the real number or at least the most realistic estimate. I’ll draw Peter’s attention to your questions as well. In the mean time, I added another photo of the wheel that Peter had sent me – see if the numbers 7Jx17H2 help you.
LikeLike
Thanks for posting this and the additional photo, though we still don’t quite see the whole wheel: the “HLT” mark would be on it like “7Jx17H2”, “OZ RACING”, “MADE IN ITALY”, &c. Like at about four- and ten-o’clock on this larger example:
Peter, I do hope you respond, particularly with the offset spec, which I appreciate will take an effort to read/photograph.
LikeLike
Gregory, I just got a reply back from Peter with a great photo! So the wheels are rated at 340 kg (750 pounds) and are +45 mm offset. Yessss.
He was unable to find HLT on the rim though. I’ll add the photo to the blog page.
LikeLike
Many thanks to Peter for the details and photo!
Looking at another [retail] OZ wheel’s inside rim, it’s stamped, left-to-right:
The FCA part number for the standard Abarth wheel is something like 68348048AA. The OZ part number for the 37mm-offset Ultraleggera is W01709200A53.
Assuming there’s nothing to the left of the “ET” in Peter’s photo, I’m inclined to think 52109667 are the central digits of the OZ part number. If it were the FCA part number I’d think they would have gone ahead and put the letters (“AA”) on it.
I’m a bit discouraged by how different the number is from the version differing apparently only in offset, though. For other OZ wheels that differ only in offset, the part numbers are very similar, differing in only the last few digits before the trailing letter and number(s). That might suggest the exclusivity you mention, rather than also being available from OZ.
LikeLike
For now, I’m going to revise my OZ wheel weight based on the majority of statements I’ve read of them weighing 3 kg (6.6 pounds) less than the stock Abarth wheels even though some reviews, like Top Gear mention 4 kg (or around 4 kg).
I also think that Tire Rack’s weight of 16 # (7.257 kg) for the retail OZ Ultraleggera is more accurate than my previous source (thanks Gregory) and am changing that as well.
Gregory, I don’t think these wheels “differ only in offset”, because the weight rating is 40% less as well (3,000 pounds), basically limiting the vehicles to which they can be installed on, to the MX-5 and the 124 Spider.
P.S. It sounds like Top Gear reviewer Stephen Dobie’s first analysis of hardtop removal was a duplicate of Peter’s experience – “with a variety of screws to undo”, when you really only need to remove 2 bolts (plus loosen 2 others), or else you’re just creating a lot of extra work for yourself. It turns out you don’t touch any windshield header bolts, as the hardtop engages similar to the soft top.
LikeLike
Hi Dan and Greg, I’m also quite sure about the 3kg weight saving instead of the mentioned 4. I’m going to try and see if I can leave the inside brackets (thanks Dan, it’s the better wording) on while removing the roof. Before that I will loosen them almost all the way and then I will connect left and right through an elastic cord or something to evade that they still snag on something. I do not intend to use the tabs, but instead make a kind of harness/sling using sailboat cords(and knots ☺️) to lift and suspend the hard top.
[I sent Dan another photo of the wheel interior rim that shows another number next to the ET numbers to be posted in place of the initial photo]
LikeLiked by 1 person
About ‘tabs made out of alloy metal ,disguised as carbon fibre’; something that might corroborate your theory: when tightening down the rear torx screws at a certain point there is an audible ‘click’. It’s the tab that bends over a certain passive point. It goes from one position to another. Before fixing the roof, pushing on the carbon fibre tab does not provoke any sound or visible movement. After tightening the torxes however and after the ‘click’ the tab moves a bit and makes friction noises. Unfastening the internal bolts does not make any difference. Untightening both the internal bolts and the four torxes that hold the metal plates fixed on the upper side of the wind screen, does not make any difference. I thought Carbon fibre was really rigid, but now the theory of alloy tabs, dawns on me!
LikeLike
Peter reported that the Italian publication Quattroruote (July) reported that the Abarth 124GT carbon-fibre hardtop will be available as an option, (at least in Europe) for €1200, which equates to $1,400.
LikeLike
Hi Ameridan,
Would you know if the +44 offset version of this wheel will fit the Abarth 124 with Brembos?
LikeLike
I don’t personally know, however in conjunction with Gregory’s comment (1st comment):
implying that the 44mm does not, hence the special GT edition was developed, I’d say NO.
LikeLike
I was writing that I thought it would be great if OZ did what we subsequently determined they did indeed do. I’m just sorry they’re not available without buying a whole new car, or (potentially, I haven’t checked availability) through an Abarth dealer as an accessory.
I’m unaware of a 17×7 Ultraleggera in a +44 offset, only +37. Where did you find it?
The information about the Alleggerita 17×7 +44 not clearing the Brembo calipers comes from Tire Rack’s hardware support team research. The Leggenda 17×7 +42 does clear with what feels like at least as much room for the Brembo calipers as the stock Abarth wheels. So I don’t think caliper clearance is only a function of offset, but also of spoke and hub design. I think it’s possible a 17×7 Ultraleggera +44 — if it exists — could clear the Brembo calipers and encourage you to test it and report back here.
LikeLike
Just talked to my dealer regarding the Hardtop since I want to get one for my 2017 Abarth.
In Germany the Hardtop is 3.500€ (don’t know if this with or without mountings) and from a mechanical viewpoint retrofitting is no problem at all.
However there is a legal issue. The Hardtop is NOT homologated for MY2016, 2017 Spiders. This is a problem here since you need TÜV approval to mount such things.
Dealer sent me the type permit IDs, so next thing I’m gonna do is ask a TÜV inspector if there is way to add it to the vehicle documents.
LikeLike
Interesting! First of all, there are no 2016 MY Spiders, and in Peter’s case, I’m pretty sure his top was added to a 2017 MY vehicle, making it a pre-production GT (without the badge). I can’t imagine why your fitting would be any different legally. I’m also pretty sure all the mounting brackets and other hardware Peter mentioned, are going to come with. Peter should have a pretty good idea as to whether the two brackets will install directly to a ST Spider (I don’t know if a mating piece is installed permanently to the vehicle, but I suspect not).
LikeLike
It‘s a bit of an EU and very much a German issue.
Currently there are two CoCs (short for Certificate of Conformity, EU vehicle type-approval document)
There are:
– e11*2007/46*3320*XX (XX represents variants, i.e. my Abarth is 03)
– e3*2007/46*0474*XX
The CoC is quite an important document since you can‘t license a car without it.
My Abarth is type approved via the first document, while GTs seem to be approved via the second document.
Here in Germany, every part you put onto your car needs an approval of some sort (e-Number, ABE, Certificate+inspection…) otherwise you are not allowed to put your vehicle onto public roads.
Now, the Hardtop is approved via the Spiders CoC, but only for the e3* vehicles.
My guess is that Fiat had to apply for a new CoC because of …reasons and didn‘t care to also get type approval of the top for the „old“ Spiders. Maybe because they thought that the profits wouldn‘t justify the expenses. But that is just me guessing.
Anyway, as i‘m told, there is no mechanical difference between the two „versions“ regarding the Hartop installation.
LikeLike
Tobias,
Peter left word with me that his 124 is indeed an E3 certification. So at least in Germany, if you want the hardtop, it might be a much easier process ordering the GT package. He’s from Italy, so I don’t know what he has to go through, if he adds other options on.
Good luck with your TÜV approval.
LikeLike
Picked my hardtop up from the dealer today.
Looks gorgeous https://twitter.com/puni_2k/status/1049678446874566658?s=21
According to my invoice part# is 52101279, price is 2800€ + VAT .
One thing to note is that the cover plugs and washers for the rear tabs were not included. Dealer is clarifiying if they simply forgot to ship them or have to order these separatly.
As for my TÜV issues, gonna just ignore it. Top gets demounted before vehicle inspection 😉
LikeLike
Tobias, you might be the first to order as a part. I’m thinking that you won’t get cover plugs and washers with yours, because they are already installed on the vehicle, whereas Peter bought his vehicle with the top installed. You should get all of the needed mounting hardware though.
LikeLike
Yeah you’re right. The kit shipped with the long screws and the two metal fixtures that you put behind the seats (manual calls them blocks).
Odd that they didn’t include the plug covers and washers. I would have expected that it’d be all or nothing.
The original covers are (accordig to the manual) held in place by the plastic fixture (bolted down with the short screws) and a piece of velcro. So these are already there on every Spider.
If you want i can provide scans of the manual.
LikeLiked by 1 person
Yes, I’m curious to read that, Tobias.
Regarding the covers, plugs and washers in a ziplock bag, those aren’t parts that come with any hardtops, but rather parts that are removed from the vehicle in preparation for installing the hardtop – just as you will do, when installing.
I’ll reword the article, in case that lead to your confusion.
LikeLike
Ah, I think we’re just talking about a different set of plugs and washers. You’re right, the “ziplock bag parts” are already mounted on the non GT cars. What’s missing from my retrofit kit are the black round bolt covers you put on the external tabs and some kind of castellated washer that goes below it.
Sorry if i confused you.
LikeLike
My pre-series does not have any cover either. What do you mean by ‘washers’?
LikeLike
Congrats Tobias!
LikeLiked by 1 person
This cover:

Described in the hardtop manual on p.23.
Here’s a picture of the section
https://drive.google.com/file/d/1GoxcT_xF-TwjGyvEouZeUrCh5oaLV3x1/view?usp=sharing
Without it you’d just look at bolt head
LikeLiked by 1 person
Yes I’ve noticed the cover on the bolt on more recent versions. I’ll see if there is an FCA part number for that.
LikeLiked by 1 person
Bolt and screw head cover caps are quite easy to find, like these Black Hinged Pan-Head Screw Covers at Home Depot, but ideally, FCA should provide them with the rest of the hardware,
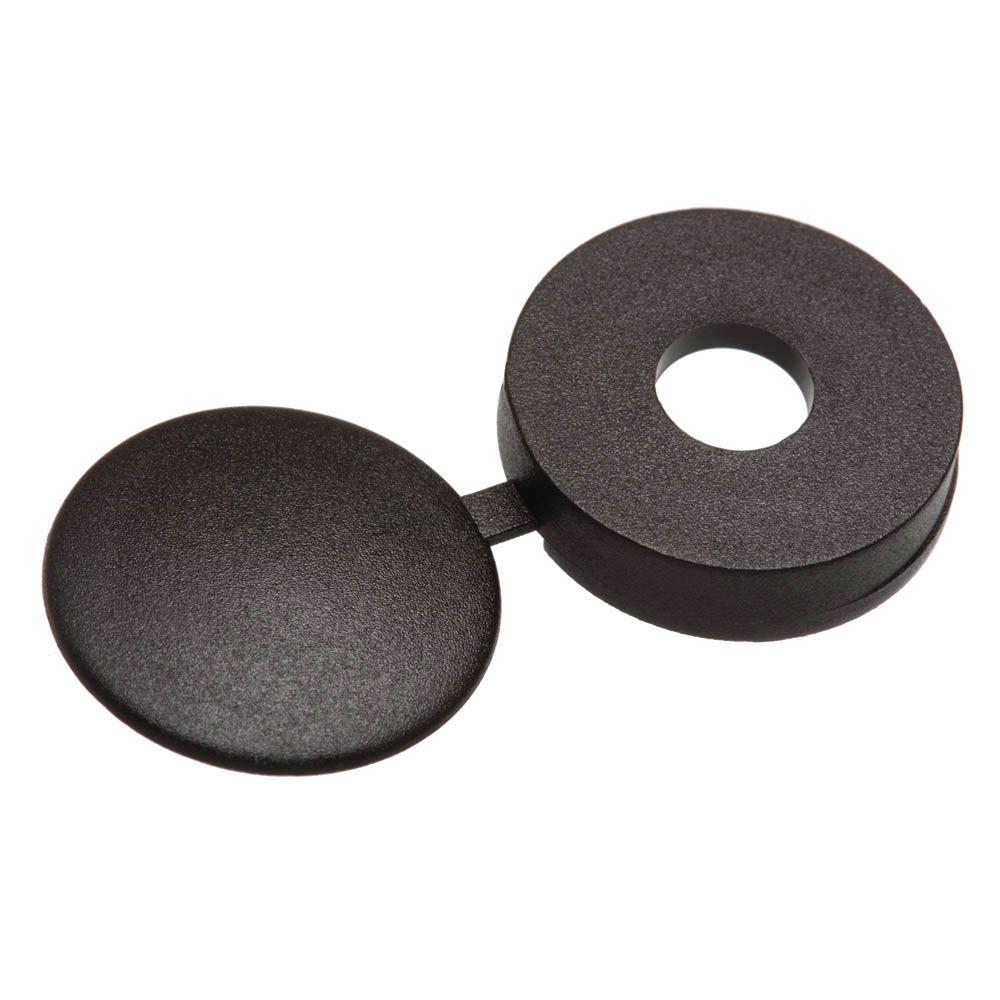
… especially since they are shown ⇓ in the instructions.
LikeLike
Peter located the part number for the 124 GT decklid emblem (52117178), and I added it to the article, primarily for those with the pre-release edition.
LikeLike
So the Miata also gets a hardtop.
https://jalopnik.com/the-mazda-miata-gets-a-carbon-fiber-removable-hardtop-1831210238
Maybe Mazda will sell some screw covers.
Last update from my Abarth dealer was that there is no part number for the covers, and the GTs they got also came without them.
LikeLiked by 1 person
Small PSA regarding the hardtop:
Removed mine last Friday and noticed that it left some unsightly marks on the “Rear Beltline Molding Protectors” (that’s what the Mazda manual calls them). That’s the small plastic on top of the rear quarterpanel where it joins the door.
The one on the driver-side was cracked while the one on the passenger side had a ~2,5 cm scratch.
Luckily I had the hardtop mounted by the dealer so they agreed to replace them. They couldn’t find the part# in the schematics so they have to contact FCA for it.
My assumption is that the guy mounting it did tighten the brackets too much. Couldn’t undo them without the help of a socket wrench.
Next time I’ll put some cushioning material there.
LikeLike
Hi Tobias, one of mine was scratched too and they replaced it (they however did not place it in the original position, but more forwards…).
With your roof, did you get the l-shaped foam blocks to cover the hole inside the B-pillar before you put the hardtop in place? Did you check if they put the right bracket on the right side? Because if you don’t it is indeed possible to tighten the roof too much….
LikeLike
Hi Peter,
yes they inserted the foam blocks, but they are no longer L shaped but rather squished.
As for the brackets: Need to check this. I put a label on each indicating on which side they were mounted. Thanks for the tip.
LikeLike
Hi again Tobias. Looked at mine. The one they replaced in an ‘off’ position is cracked too. In two places. When I take the roof of, I’ll inspect it better. From the diagrams I found, it looks like this piece is fixed with a screw. I think they took mine of by force and then placed it back with volcanic rubber(still soft after a year). Do you have the part numbers for the right and left one?
LikeLike
Not sure if it really is fixed with a screw but rather with a plastic clip, but haven’t removed it yet so can’t tell.
When I was at the dealer yesterday they couldn’t tell me any part number. They showed me the program they use to determine which part to order. You choose a certain area of the car and it shows you a schematic with the rough outline of the part and its rough position.
Problem is that you first have to find the correct schematic (since sometimes there are several for a certain area) and then have to guess if the blob on the screen is the actual part you are looking for.
Also you can’t really search by name since these apparently got translated from Japanese into English, into Italian and then into German. Otherwise some of the names there don’t make any sense.
They promised that they will call FCA and ask them about the correct number but also told me it could take a few days.
LikeLike
Hi Tobias.
I found them. The Mazda schematic is the same as the 124 one and as such found them through Eper(at the dealership). The part numbers are 6000614068 and 6000614069. Alas, when I google them I do not find them. I cannot tell you which is right and which left. Mazda part numbers for the same pieces are N243-R1-742B (left) and N243-R1-741B (right).
Something else: there is going to be a 124 Spider ‘raduno’ on the 18th/19th of May in and around Mugello Tuscany(organized by Francesco Ulivieri di 124 Spider Italia, fb)..😉
LikeLike
Wow, that’s a major job!! Perhaps the hardtop installation instructions need to be written better. 😉 I added the part numbers, as well as a photo of the crush issue to the article, all provided by Peter.
LikeLike
Hi Peter,
thanks for going through the trouble of finding the part#. *two thumbs up*
Just had a look at the picture of your protector. *Wow* that makes mine almost look like brand-new 0o
Yours really is mounted way too forward. Mine stops right at the end of the quarterpanel. I’d guess that the protectors are asymmetric and they mounted one intended for the other side?
Maybe it is a good idea if I glue my cracked protector so that I can use the already scratched protectors with the hardtop and the new ones with the softtop.
Also have to remember buying some spares once Mazda stops producing NDs 😉
On a different note: Personally I wouldn’t try the hang the hardtop from the tabs. While removing it I noticed that the area below the window has quite a bit of flex. The tabs seem to have a metal inlay of some sort but the area where they join the rest of the top is just plain carbon fiber. Even if the carbon manages to handle the load I would be too afraid of putting too much stress on the window or its sealant.
I think Peters idea of using the Thule hangers is the best solution. Mine currently lies flat in an unused storage room, but this is unfortunately only temporary.
LikeLike
I looked up the term you used: rear beltline molding protectors…found these guides, I guess you must have seen them too. Interesting for every 124 owner as well I think: http://mazdaman.x10host.com/SM356169/
LikeLiked by 1 person
https://www.originparts.de/sitemap/Fiat/Fiat0152.html 😉
LikeLike
I do have the 124GT emblem, just not applied! 😉
LikeLiked by 1 person
Peter has just relayed some more hardtop stuff, courtesy of Ovo, which I’ve added to the article:
* Hardtop Owners Manual pdf
* Photos of a Storage Rack made for the hardtop
LikeLike
Hi there,
summer’s leaving and I had a look at my hardtop again. I bought it in September 2018 for my Abarth 124. Dealer mounted it and I removed it again in Feb 2019. When I revisited this post and went through all the new content and details, I noticed that those foam blocks were not included in my delivery. I’m not clear about their real purpose, do they actually do something useful? I don’t have any issues with my “Bolding Protectors”.
Then, I noticed it’s a hell of a job to attach those metal brackets. When the dealer installed them in the first place, they had them attached loosely when they attached the hardtop; now looking at the openings in hardtop for the “fingers” of the bracket plus the rubber rim where the lower part goes, I think it is not possible that way and I’m almost certain they didn’t attach the hardtop correctly. Anyway, are there any tricks to find the right lateral position for the fixtures, as I cannot get the screws to find the holes given the little space to work on?
Thanks,
Jay
LikeLike
Jay,
Peter has kindly responded via email with answers that you hopefully find useful. I have added his reply (along with all of his photos) in a new section at the end of my article. Grazie Peter!
LikeLiked by 1 person
Compliments as always for your splendid
blog, well organized and accessibile. IMHO much better than fb.
LikeLiked by 1 person
Excellent, thank you Peter and Dan!
What I noticed when pre-mounting the brackets is that either they don’t properly wrap around the rubber on the lower side, or alternatively the upper part isn’t correctly fitted to the hardtop. So I think if one can accept a bit of compromise, pre-mounting is a valid option.
Cheers,
Jay
LikeLike
Just to conclude, when I mounted the hardtop today I used the following tactics: I pre-installed the bracket on the passenger side since I found that one much harder to deal with once the hardtop is on the chassis. I think someone reported a similar experience. Then I began by attaching the hardtop to the windscreen. With a second person securing the top, the back was just flexible enough to push the bracket on the passenger side under the rubber. On the driver’s side, I used a small mirror to align the bracket to the whole as someone suggested. All in all, it took me 45 minutes to install the hardtop with a second person helping for 5 minutes. I’m very happy with the result.
Thanks again for your help,
Jay
LikeLiked by 1 person
For those that are following this comprehensive hardtop article, Peter has sent me some more updates, since he was fortunate enough to have his hardtop replaced under warranty, due to a failed rear mounting tab.
LikeLike
Could someone produce a YouTube video showing how to fit the top and comment on some of the “dos” and “donts” for fitting the top? This article is VERY helpful but it would be even more helpful to watch a video that zoomed in on each area.
LikeLike
For the fitting of the hardtop you do not need a video, it,s that easy. On the other hand you need two persons so there needs to be a third person present to make a video. However for the most cumbersome part, the fixing of the internal lateral brackets, there it would come in handy. If only there would be enough space to do so. As it is, unfortunately fixation of the hexagonal 13 mm bolts needs to be done on touch and as such ‘in the dark’.
LikeLike
Hello there, I wish to resume this 3d because I encountered an unexpected problem when I upgraded my Lusso with the Brembo 2 pistons calipers of the Abarth version. I use for daily driving the abarth OEM wheels and left the Lusso OEM wheel aside fitted with track tires to be used when tracks will open again (hopefully soon) . In these lockdown days I wanted to check how was the look of my car with the new tires and …surprise ( at least for me) , the Lusso silver wheels couldn t be be installed since they interfere with the caliper body of the Brembo brakes.
Now, since OZ ultraleggera is making wheels for the 124GT I wonder if what is available as aftermarket , is ok with my car. There s a lot of confusion. By reading this blog , the Ultraleggera 17x7j ET45 is used on the GT; but the 124 is also using a different brembo calipers ( 4 pistons vs 2 pistons of the abarth system) if I am not wrong, therefore dimension might differ from the Abarth Brembo I got. On the other hand ET+45 means very little since the Lusso OEM silver wheels do not fit in spite of being ET 45. there s a guy selling 4 Ultraleggera having exactly the size claimed by the GT : 17x7j ET45. He fitted that on a Fiat PUNTO! .
I am inclined to buy them but after contacting a local shop selling OZ , they said that the OZ ultraleggera ET +37 appears to be the wheels for my car and brakes…I ma very confused Probably I am asking something very difficult to be confirmed but before buying a third set of wheels to happily go on a track, I prefer to check around. thanx for anyone having better info I get
LikeLike
The guy selling the OZ ultraleggera with ET45 must have a GT himself. If he doesn’t I doubt it’s the GT rim. Made by OZ specifically for the GT and only obtainable through the FCA/Mopar parts detailers. Otherwise this rim exists only in ET37, which makes it sit about 1 cm more to the outside.
LikeLike
Thank you Peter . No he doesn’t t have a GT . Understood . Now , question : is the OZ ET37 sitting this 1 cm outside fitting the Brembo or still it does not ? According to your experience , do you see a problem in the set up ? Thanx
LikeLike
Yes they do. Many people with the Abarth bought them aftermarket and as such theough an oz salespoint. ET37 is the norm, nonproblems with the Brembo’s.
LikeLike
Thank you so much Peter!
LikeLike
You’re welcome!
LikeLike
Hi Peter,
as far as I know ET37 isn’t the only version that the Ultraleggera is available in.
I found listings and certification for other offsets as well.
The most interesting might be the +44 variant.
Here is a link to a certificate for it relevant for the German TÜV.
Click to access FIAT_HYUNDAI_KIA_MAZDA_SUZUKI_TOYOTA_00317634.pdf
It explicitly allows mounting the wheel on Fiats and Abarths as long as you DON’T have the 4 piston Brembos mounted on the front axle 😦
Don’t know why this is since (if i’m not mistaken) ET44 should give you more space than ET45.
LikeLike
Hi Tobias,
The ET44 does not fit the the Brembo brake calipers.
There’s also lower ET yes, but more than 1 cm might create stress in suspension struts and arms, bushings etc.
LikeLike
Tobias question was raised by me to understand what OZ fit with the brembo calipers . 44 do not . They are ok for OEM calipers though.
LikeLike
Hi Peter,
you have any information on why ET44 doesn’t fit but 45 does?
I always thought that if the offset is lower then the wheel will stick out further. So ET44 should give you 1mm more clearance?
Or is it that the shape of the 44 is slightly different so that it will collide with the caliper nonetheless? Wondering is spacers would help then…
LikeLike
The Shape of the Ultrallegera made by OZ for the GT in ET45 has a different shape on the inside in respect to the ET44 yes.
LikeLike
As I have pointed out , the Lusso OEM ET45 do not fit!!! It is not a question of 1-2mm but the shape of the wheel. In fact the abarth wheels fit and have a clearance of 5mm. Today I’ll try to see how much is the clearance needed to clear the lusso . If it is 5mm or less ( I doubt about that), I’ll go with a 5mm spacer. If not the OZ ultra et 37 are the way to go
LikeLike
Just to add a maybe useful info, the Lusso wheels will fit the Brembo calipers.with at least 10mm spacers. Don t think they exist in this thickness, next avalable are 15mm which are way too much . Now , looking forward for OZ ultraleggera ET37.
LikeLike
I would [advise not using]
not putspacers….LikeLike
Agree. I will not . I was tempted if a 5 mm would have been ok . Since I d need 15 , that a would be a no go for the same reason I believe you advice not to . I ll sell my Lusso wheels and get a OZ i UK Ltr al when I find them .
LikeLike
Peter supplied more photos and commentary, primarily having to do with the rear mounting tabs, which I’ve added to the article. Thank You Peter!!! I’ve tried to organize the article in sections to make it easier to read. And remember, in the footer is a Google translate button “QUALCUNO ITALIANO?”, should you prefer a language other than English.
He also provided an update on what you can expect to pay for the hardtop as an accessory item – it’s much more than the option ordering a 124 GT.
LikeLiked by 1 person
Maybe someone else might find this useful.
Because of the limited space I always got really annoyed using a wrench to tighten the interior bolts.
So I got me one of these
,a set of 1/4″ hex to socket adapters and a 13mm socket. IMO makes this task so much easier. [ameridan added: Or you could just get this set to eliminate the various pieces detaching, and keep the overall size small]

Oh and regarding my issue with scratching the “beltline molding protectors”. Last winter I put a few layers of this tape

on top of the protectors (well different brand but you get the idea) and only torqued the bolts hand-tight.
Mixed Result: Passenger side was fine, but left a big scratch on the driver side (didn’t split though). Edge of the hardtop cut through the tape.
Since I have retired my Spider from winter duties I won’t need my hardtop anytime soon. Guess I’ll replace the scratched protector again hopefully for good.
LikeLiked by 2 people
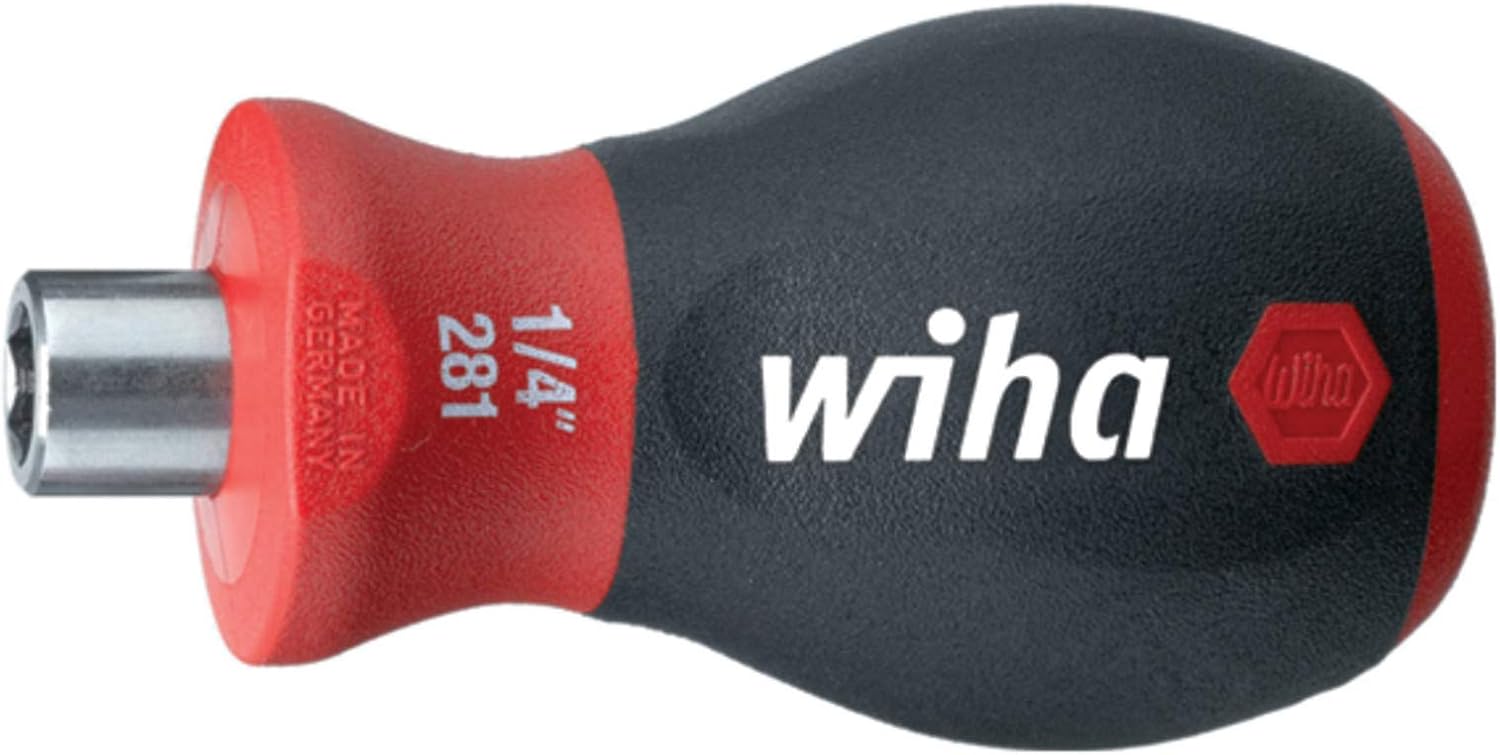
Great Tobias! I already spread the word to various HT owners and ordered a Wiha Stubby (with a name like the antenna most of us have) it can’t be but good!! The protectors, I still have one set..😅
LikeLike
I added a suggestion for the 13 mm socket to Tobias’s comment.
LikeLike
Hi Dan,
that’s certainly a good idea for people that would otherwise have to get all three parts.
Personally I found that my adapter detaches easier from the stubby than from the socket, but that might just be due to tolerances. I’m using a “Wera 870/1″ which is also just 1” in length.
That said, you can never have too many tools 🙂
LikeLike
Lawson Gibbles reports that Mopar will mail you some caps (as a courtesy), if you ask nicely, should you find yours missing. In her case, there was a different part # associated with the package of 4 caps (1070100125). I’ve added all this to the article today.
I altered some wording in the article for clarity today. What were referred to as “holding plates”, I changed to “metal cap retaining clips”. What were referred to as “covers”, I changed to “caps”.
LikeLike
I added a photo by Thomas Gutdeutsch of his hardtop stored in his garage hanging by the tabs, so apparently they are strong enough, although Peter T. advises caution doing so because “the metal rings which are inside can get loose”.
LikeLike
I want to buy a hardtop for My 2020 124 Spider Abarth. Can anyone help? Where can I look? Dealership where I bought the car from tells me availability isn’t there at this time.
LikeLike
Steve, if you are in North America, the Fiat hardtops are pretty much unobtainable officially, but Peter offered this link (thanks Peter!!), if you wish to pursue importing one:
https://www.abarth.it/mopar/accessori.124-spider.personalizzazione-esterne-7.hard-top-in-fibra-di-carbonio-52101279
LikeLike
Peter located some other hardtop related documents, and I added info and links to the article:
To all of the mounting bolts install sentences: (don’t exceed 2.5 N♦M / 22 in♦lb).
If you wish to see more details on the construction of the hardtops, there is a Construction Quality Guide from the manufacturer @ http://elearnediting.fiat.com/eLearnWeb/ContentPdf.aspx?Pdfid=357000139
LikeLike
Wanna’ add some more carbon fibre components (hood, decklid, windshield surround) to reduce some weight? Check out https://bmotortech.company.site/Estetica-c86267441
Thanks Peter.
LikeLike
Chris Langham posted a nice photo of the hardtop on a dolly (produced for Miata hardtops) that shows the underside quite nicely.
LikeLike
Good morning Ameridan, could you please point me where did you found this photo? Im trying to buy a hardtop and potential seller send me pics of one on a same stand and with very very similar background. Im wondering if this is a same photoset or not. Thank you!
LikeLike
I no longer recall where I had seen the photo, but if I understand correctly (I can’t read Italian), the stands are quite common for Miata hardtops, as per the first page of the document @ https://21stcenturyfiat124spider.files.wordpress.com/2018/05/hardtop-manual.pdf
LikeLike